How to Promote Your Online Shop with Facebook
If you’re interested in creating a social media strategy to promote your online business, you may find that Facebook has some great features to utilize for business owners and connecting with other people in your niche.
Similar to promoting your biz with Instagram, Facebook works so much better when you promote less and engage more!
I mean, it is called “social” media after all.
If you’re still interested in adding Facebook into your routine, read through this guide to find the best tips to properly use Facebook to direct traffic to your online business and make more connections.
Related Post: How to Double the Traffic to Your Printable Planner Etsy Shop
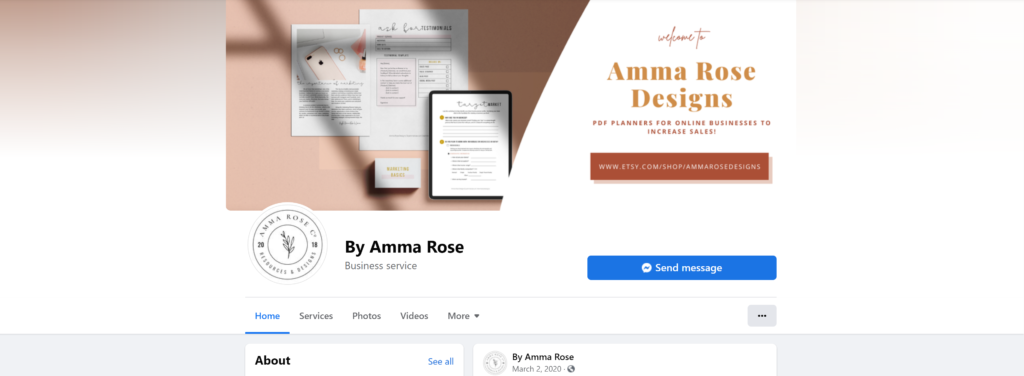
SET UP A BUSINESS FACEBOOK PAGE
You may already have a personal Facebook account, but for the sake of your business, you should set up a dedicated page to represent your Etsy shop.
Not only does this separate business from pleasure (and saves you from accidentally annoying your aunts and cousins from all your business posts), it also gives you access to Facebook’s analytics tools, and you’ll look a heck of a lot more professional!
Not only that, but your Facebook page is going to act as a “landing place” for your audience to get to know more about you and your business.
The rest of the marketing magic?…we’ll talk about that later.
Here’s how to set up a business page for your Etsy shop on Facebook:
1. Login to Facebook with your personal profile
Your personal profile will become the admin of your new business page. If you wanted to add more admins later, you can do so after setting everything up.
Side Note: Your personal information will not be shown on your business page.
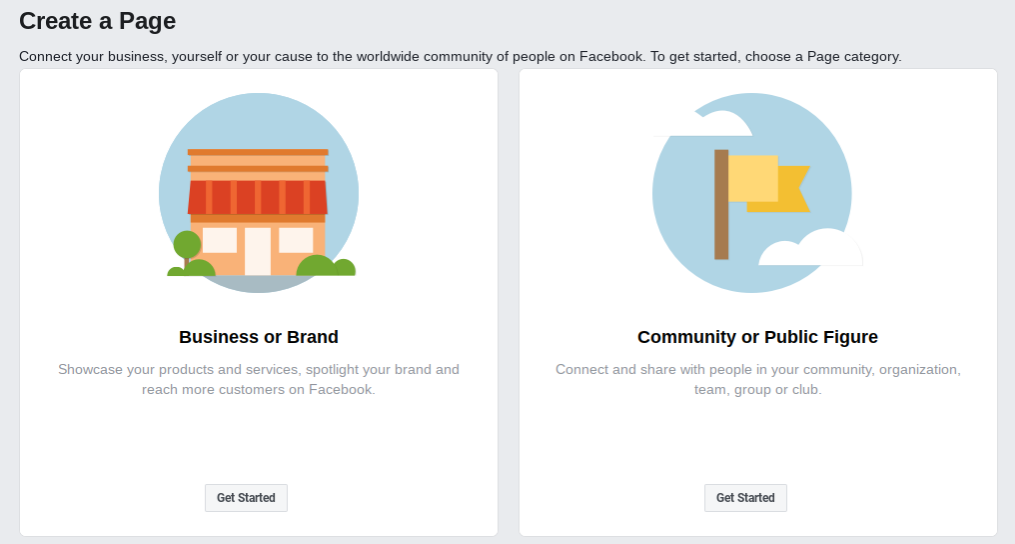
2. Go to the top right-hand corner and click the triangle to pull down a drop-down menu. Select “Create Page”.
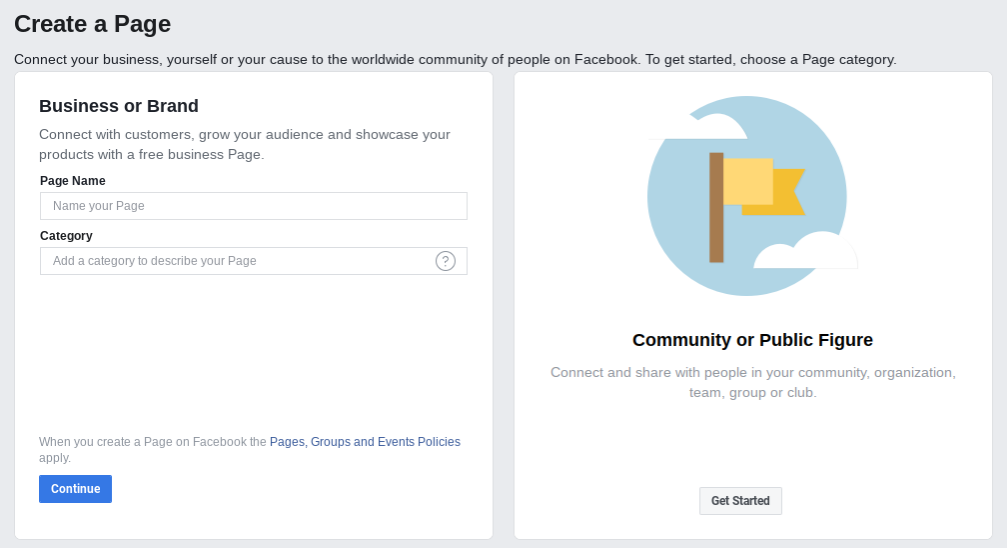
3. You’ll be given the option of a “Business or Brand” page or a “Community or Public Figure Page”. Select “Business or Brand”.
Select a Name for your Page and choose a category. You can change your category later on, but it’s best to set it up correctly in the first place.
6. Add a profile picture
7. Add a cover photo
8. Set Up Your Page
Facebook has some amazing features for business pages, which allow you to put almost every single piece of information you could ever imagine on it so your customers will know how you are, what your business does, and how they can contact you.
Go through each of the sections on your Facebook page and work your way through filling in all of the relevant information.
Try and stay as detailed as possible so your customers can have a pretty good idea of your brand and business before they commit to purchasing from you.
9. Your new page
You will now be redirected to the timeline of your new Facebook business page.
Congratulations! You have a Facebook page for your Etsy shop.
CONNECT YOUR ETSY SHOP TO YOUR FACEBOOK PAGE
Here’s what you have to do:
- Sign into Facebook using your Facebook personal profile.
- Go to Etsy.com
- Click on “Shop Manager” at the upper right hand corner.
- Click on “Settings” in the left hand menu and select on “Info and appearances”
- Scroll down to the “Links” section and click on “Connect with Facebook”.
- A list of all the Facebook business pages that you are admin of will appear. Click on the one you would like to connect your Etsy shop to
- If you want to connect to a new business account, you can edit this at any time.
“SHOP NOW” ON FACEBOOK
Facebook business pages have really made it easier to get sales.
You can turn random browsers into potential customers by taking them straight to your store from your page.
Here’s how you can send your audience straight to your Etsy shop:
- Right under the cover image area of your page, you will find a blue box that says “Add a Button”.
- Once you click on it and come options will appear.
- Choose “Make a purchase or donation” from here.
- Select “Shop Now”.
- A pop up box will appear asking you to put in the link you would like to send people to. Copy-paste your shop URL here.
- And done! Once your audience clicks on this button, they will be directed to your Etsy shop
ADD VALUABLE CONTENT TO YOUR PAGE
Obviously, once you get your Facebook page started up, you’re going to want to start adding some content to it.
This is going to be a great space to keep your shoppers in the loop about anything new or providing helpful information for them to enjoy.
Who Are You Trying to Reach?
As you go through the process of setting up your Facebook page, you want to keep your target audience in mind.
The more specific your target audience, the better, because it’ll be a lot easier to predict where to find them and what kind of content they will be engaged with.
Remember: It’s not a numbers game when it comes to social media (no matter what anyone tells you). Let go of the idea that numbers are everything and instead prioritize creating an audience that loves your business and engages with your content (this makes being on social media a heck of a lot less stressful!).
Here are some content types to consider for your Facebook Page:
- Facebook videos
- Facebook Live
- Memes – works well depending on what your brand personality is like
- Photos
- Relevant articles – thought-provoking (and even controversial) work best
- Plain text statuses – should be well-written content that invites sharing
Every piece of content type can be used to fulfill different types of goals, so don’t be afraid to experiment! A healthy mix should be used so your page isn’t dull and predictable.
At the end of the day, every piece of content you publish should be backed with intention and reflect your overall brand personality/voice.
You’ll also want to promote your Etsy listings as well!
When promoting a new item, add interesting details to keep your posts from feeling overly promotional.
Your captions provide a space where you can show your process, your sense of humor, or explain what makes your products unique – take advantage of it!
JOIN FACEBOOK GROUPS
Now that you’ve set up your Facebook page, you have a landing place for your customers to go to get to know you better and stay up to date with your business.
But what exactly is the best method of promoting your business to your audience on Facebook?
In my opinion, Facebook Groups should be your main focus when it comes to your Facebook marketing plan.
There are many groups online and in your area, all with their own distinct purpose. Whether you need a general shop critique, social media advice, or help with SEO, there is a group for you.
More importantly, it’s a great place to get your name out there and attract customers.
Some of the benefits of joining Facebook groups include:
- Share new listings and get visitors to your shop
- Establish yourself as an expert in the field
- Request and received feedback and advice on your listings and shop setup
- Connect with other Etsy Sellers on your social media
- Share links to your other places online – such as Pinterest, Instagram, and blog posts.
- Keep up to date with what’s going on within the Etsy community
FIND FACEBOOK GROUPS IN YOUR NICHE
Here are some quick tips to find the right groups for your business:
- Find the right groups by searching specific keywords in your niche in the Facebook search bar
- Go to Pinterest and search Facebook Groups. Pay attention to the post date because a lot of times you’ll find an outdated list of Facebook groups
- Google it! Google usually showcases up to date resources so you’ll be able to find relevant information on the best Facebook groups to join
Pro Tip: Pay close attention to the groups activity for the past 30 days before you decide to join the group. You don’t want to have too many people posting where your posts will be buried under thousands of posts paid per day. But you also don’t want there to be too little activity to where no one has posted!
HAVE A GIVING MINDSET
I’ve probably mentioned this a million times already on my blog, especially when it comes to social media strategies, but it’s such an important component to finding success!
For any type of social media strategy to work, you have to have a generosity mindset!
Always give more than you take.
Before you post something yourself, go through and try and leave a comment on two to three people’s posts (whether it’s helping them out on a question they’ve asked, giving them encouragement, or linking them to a resource that’s no yours).
This is the entire point of collaborating on Facebook groups!
It also helps your reputation and you’ll have even better results compared to link dropping.
STAY ON TOP OF YOUR GROUP SCHEDULES
So, you’ve applied and got accepted into multiple Facebook groups.
Great!
Now, you’re left feeling overwhelmed…every single group has a different promotional schedule and you just can’t keep up!
For the next couple of steps, I’ve provided you a free resource to help you organize your Facebook group marketing efforts – because I’ll be the first to admit that it is hard to keep up with a lot of Facebook groups.
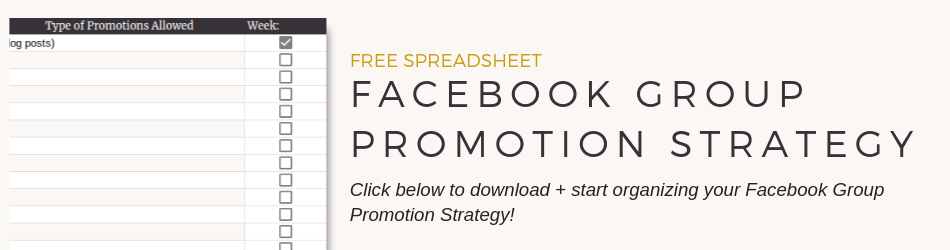
Write Down Your Facebook Group Schedule
The first step is going to be taking some time to write down the promotional days of your Facebook groups and plug them into each individual weekday in the spreadsheet.
You’ll be able to change the week’s date at the top and recycle the spreadsheet for the entire year!
The promotional days (each group is different but typically you’re only allowed to promote your content once a week on a specific day), is going to be the days you’ll be able to get your content out there!
To find the promotional days, in most groups they will either be written in the pinned post at the top, the description, or under announcements.
Post on Promo Days
For each day of the week, look through the spreadsheet and select what day it is to find when Facebook groups you’re able to promote on.
You can promote piece of content that you have, both old and new.
Things such as:
- Opt-ins or freebies
- Blog Posts (you can post the meta description you put in your blog post for Google or your Pin descriptions to keep things interesting but without giving all of the content away)
- Social Media Profiles
- Etsy shop products
After you’re done posting and engaging with others on your Facebook group, put a check mark next to the group in your spreadsheet so you know you’ve completed it!
On the days outside of the promotional days, schedule some time to go through each group and comment, like, and collaborate as much as you can (this is where the generosity mindset comes in).
PAY ATTENTION TO WHAT YOUR AUDIENCE IS SAYING
If you’ve done your research and joined groups that are right for your and your brand, you’ll be interacting directly with your target audience.
In most Facebook groups, many of the members are going to be there to get answers for their questions and expressing their pain points or problems.
Not only are you there to help them and establish yourself as an expert, this is also a great opportunity for research.
Pay attention to the types of words they are using and the questions that they are asking.
This can help you later on with your marketing, blog posts, headlines, and social media posts.
By using their words, you can speak directly to them, making it super easy to get them on board to purchasing from you!
POST OFTEN!
The best part about Facebook groups is developing relationships.
There’s nothing like being able to laugh, cry, and celebrate with your audience.
Over time, these people are going to come directly to you for help because they begin to become familiar with your name and profile picture, they trust that you’ll be able to help them, and this this is going to be what helps build those customers you have for life.
If you only show up once a month, there’s no way you’ll be able to build these relationships.
Facebook for Etsy Sellers
And there you have it!
Facebook is a super fun way to build connections that last.
Don’t forget to get your copy of the Facebook Group Promotion Spreadsheet so you can keep track of those important days to promote!
Let me know your thoughts in the comments below!
- Are you already on Facebook for your business?
- How often do you post on your Facebook groups?
- What’s your biggest worry or concern about being on Facebook?