Three Steps to Setting Up Your Planner Document Settings
At this point, if you’re following along with our How to Design Planner Series, you should have already researched or brainstormed your ideas, and you should have outlined your project on paper. Now, it’s time for you to actually sit down and design your planner on your computer.
There are three settings that you have to get right if you want to design a quality planner:
- Page Size
- Page Margins
- Page Bleed
Let’s get right into it!
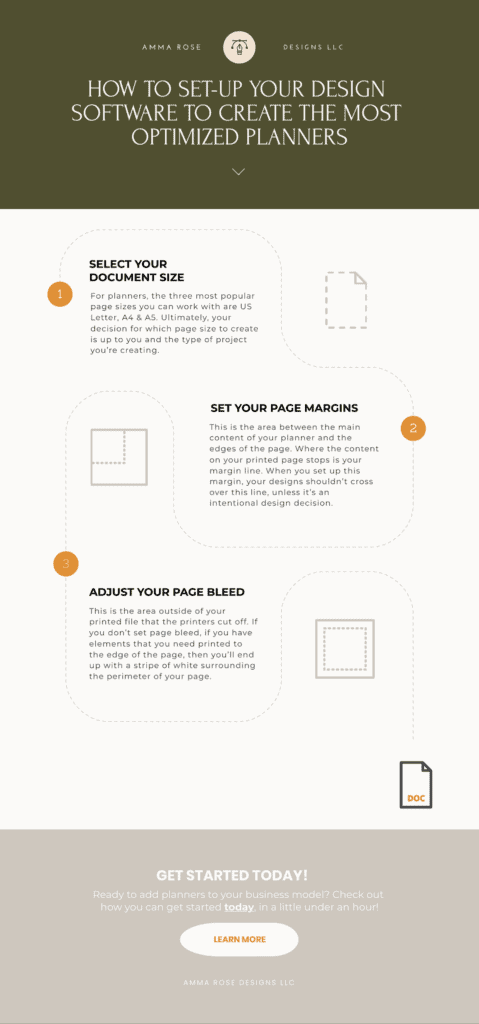
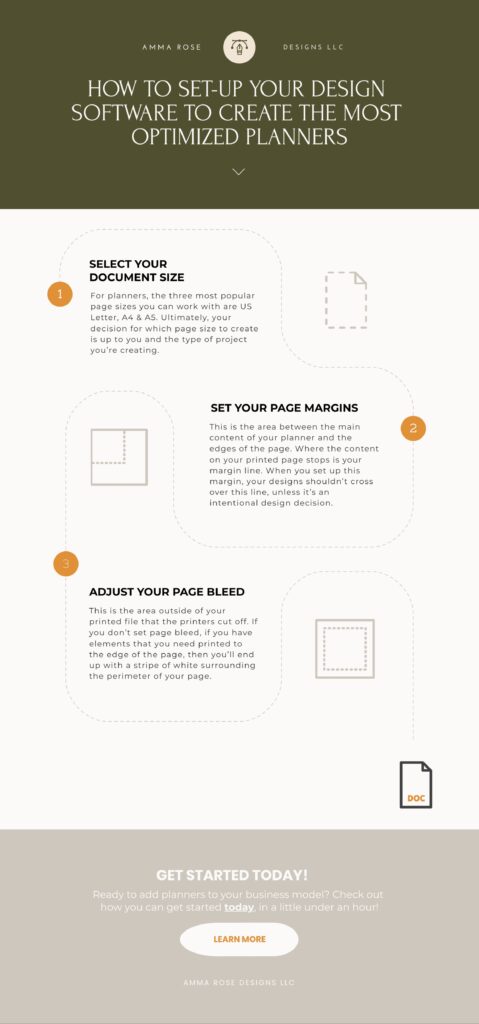
Step 1: Set Your Page Size
Let’s dive right into the first step, which, naturally, is to open up your design software and select the document size you want to work in.
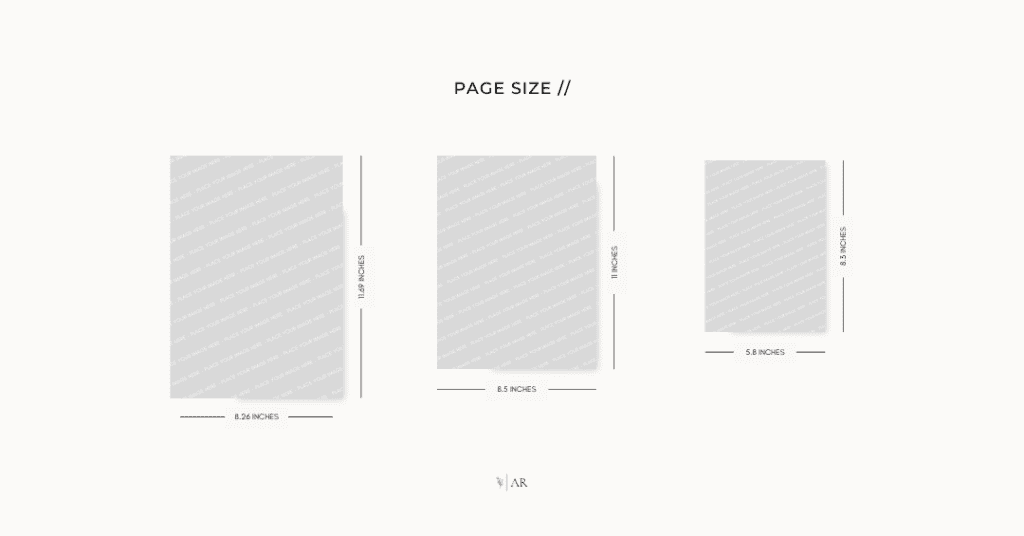
For planners, the three most popular page sizes you can work with are:
- US Letter – 8.5 in. x 11 in.
- is commonly used as office stationery in the United States, Canada, Chile, Colombia, Costa Rica, Mexico, Panama, the Dominican Republic and the Philippines.
- A4 – 210 mm by 297 mm
- the standard paper size commonly used everywhere except North America and parts of Central and South America.
- A5 – 5.8 in. X 8.3 in
- is roughly half the size of A4 sized paper and mainly used for the creation of booklets, leaflets, and flyers.
- for planners, this is the perfect size for pocket planners that you can take with you on the go.
Ultimately, your decision for which page size to create is up to you and the type of project you’re creating. For example, if you plan to sell printable planners online as instant downloads, it may make sense to offer US Letter, A4, and A5 planners so you can reach a broader audience.
If you plan to print your planner professionally and sell it as a hard copy, it may make more sense to select the page size that’s mostly used in your country to start because your local area will likely be your target market. Plus, it may be costly at the start to print multiple sizes of the same planner, making it smarter financially to choose one to begin with.
If you’re planning on utilizing a print-on-demand service, you may be limited to the page sizes that that particular company prints in, so be sure to check out their page size requirements before you start designing.
Step 2: Set Your Margins
Okay, now that you have your document size set up, let’s get into a few of the technical aspects of design you should set up in your design software. The first being margins, which is the area between the main content of your planner and the edges of the page.
If you look at anything that’s printed, you’ll notice a stripe of blank white space around the entire perimeter of the page. Where the content on your printed page stops is your margin line. When you set up this margin, your designs shouldn’t cross over this line, unless it’s an intentional design decision.
Typically, you wouldn’t want your planner content to go all the way to the edge of the page, the main reason being if your planner is to be printed, you risk your designs being cut off once it’s binded or if the page is hole punched.
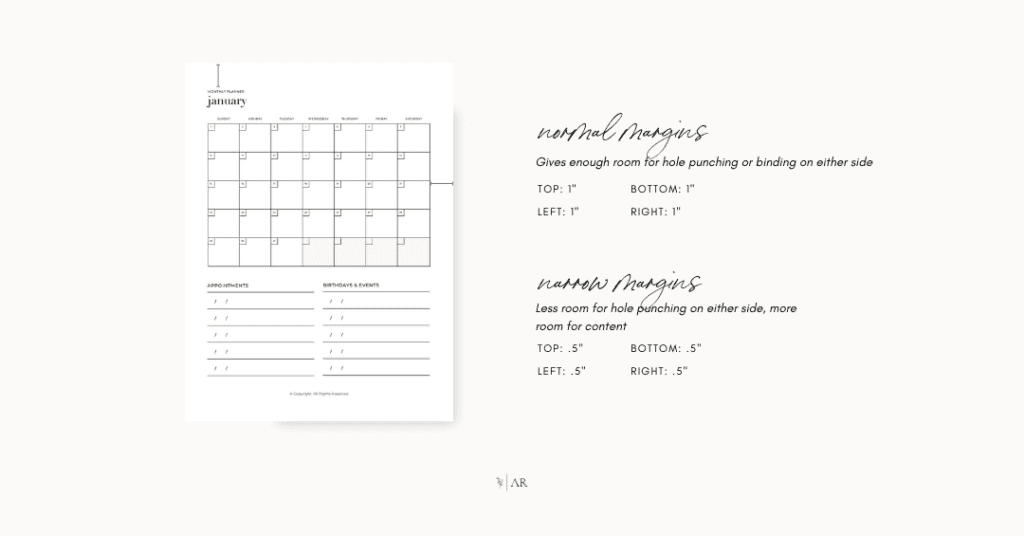
- Normal Margins
- gives you plenty of room on either side of the page for binding or hole punching
- is typically 1 in. on the left and right side of the page, as well as the top and bottom of the page
- Narrow Margins
- gives you less room for hole punching, but gives you room to fit more content on the page
- is typically half of an inch on the right, left, top, and bottom of the page
Again, the margins you set will likely depend on the type of project you’re creating, so keep in mind how your planner needs to function before you set it up.
Step 3: Set Your Page Bleed
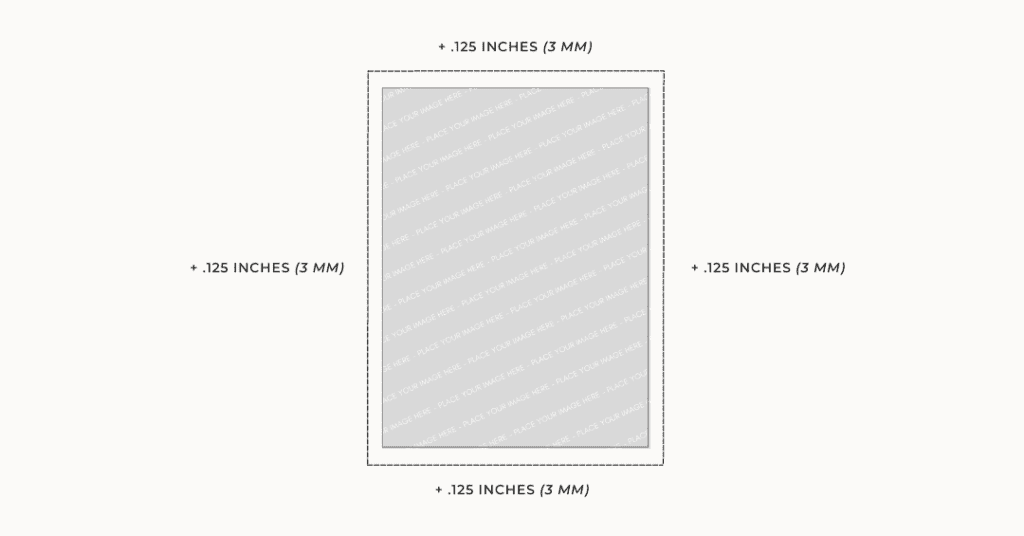
Next, you’ll need to be aware of your Page Bleed, which is the area outside of your printed file that the printers cut off.
If you don’t set page bleed, if you have elements that you need printed to the edge of the page, then you’ll end up with a stripe of white surrounding the perimeter of your page.
So, if you have content that you need printed to the edge of your page, add .125 inches or 3 mm to each side of the paper. This will make our document .25 inches or 6 mm larger in both the height and width.
Planner Set Up Process
That’s it! Those are the three things you’ll need to set up before you start designing your planner. Starting your project off with the appropriate document settings will help you avoid resizing or reformatting later on, which wastes time and resources. Get it right the first time with these tips outlined in this post and video.
And also, if you’d like to learn more about how to actually sell your planners online, feel free to check out our free ebook – How to Successfully Sell Digital Products Online – where we’ll go over how to take the planners you’ve designed and turn them into passive income.
As always, thanks so much for stopping by!
Until next time.